Autodesk 123D Catch desktop & smart phone app
Last week, we visited the Ackland Museum to use one of their objects for our first foray into 3D scanning. I chose a squat, spouted object for my first project.
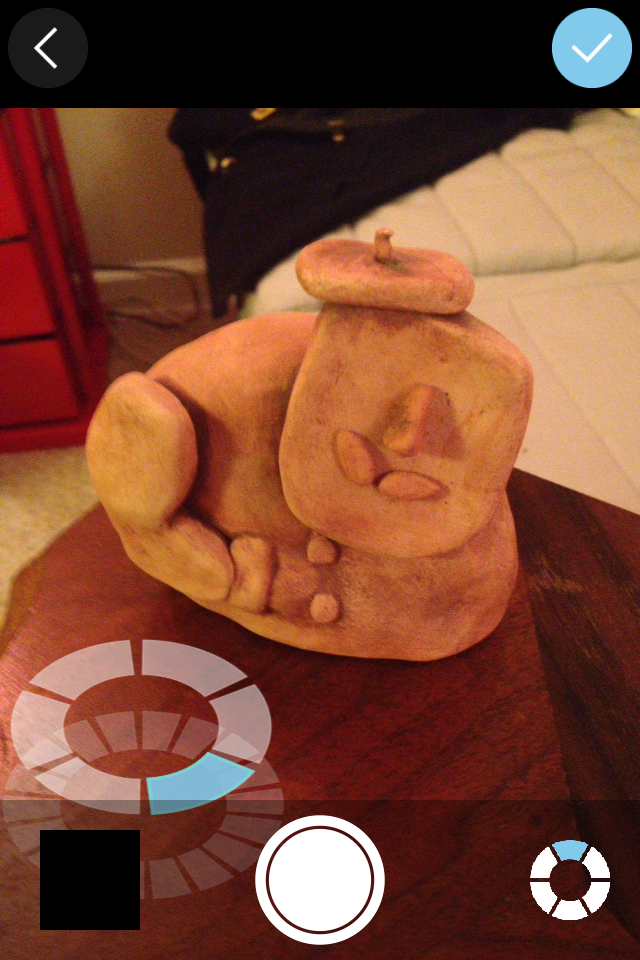
The phone app is a huge help in terms of starting out with lens distance and the number of photos required for a baseline. There is a 70 photo cut off, so don’t get too enthusiastic if you’re using the app. But if you follow their model (the blue segments), you get the right number with a sufficient amount of overlap to construct the 3D render.
But it’s certainly a lesson in patience. There are several stages of upload that require users to dredge up the patience we used to exercise when dial-up was our only option. JJ supposed that the wait time might be a part of the way the site processes the photos—maybe it’s constructing the model as it’s uploading the photo. If you have internet connectivity issues (the struggle is real, even on our university network), don’t worry too much—I walked too far from the building while it was ‘Finishing,’ and the app asked me if I wanted to continue on my data plan. Even still, it stayed on that ‘Finishing’ screen for hours. I finally just let the phone alone and went to bed. When I opened the app up the next day, it offered me the option of publishing the upload, which went speedily. So lesson learned: don’t attempt a project under time pressure.
The Autodesk application is meant as an intro to 3D scanning and potential printing (123D Make). So there’s a limit as to editing the model after it’s been uploaded. Pretty much all you can do is add tags and a description without any tools to manipulate the model itself. You can download several different file formats, though. It also allows you to share the project on various social media platforms or embed it (as seen in the first image). If you’re new to 3D scanning, this is definitely the way to start.
Agisoft PhotoScan (& Sketchfab)
PhotoScan, on the other hand, is better either for beginners with the option of a tutorial or for those with a little more familiarity with image manipulation software. The learning curve isn’t as steep as with Adobe products, however, since the basics of what you need to do (in the order they need doing) show up on the ‘Workflow’ dropdown of the menu. As you complete each step, the next steps are no longer greyed out. For each task completed, more of the toolbar is made available to you. For example, once the photos are aligned, the dense cloud constructed and the mesh build, you can view the various underlying structures of the model. To help fill in the gaps, you can use Tools>Mesh>Close Holes and the software will interpolate what’s missing. The best part, though, is that the default setting for all of the stages result in a respectable model that renders non-reflective surfaces and textures beautifully. For example, the model we constructed during class involved a brick wall, and it really did look like an actual brick wall by the time we finished, and just on the default (medium) settings. The only caveat: Make sure you’re working on a computer with a a good bit of memory behind it—the speed and capability of the processing is limited otherwise.
Once you have the model as you like it, you can use image editing software to alter the aesthetics of the model. DO NOT make any alteration (including cropping) to the photos in the process of taking them nor before aligning them. Once the photos are aligned, you can crop them in the program to hone in on the object. For the amount of light and sharpness, export the material file and .jpg. Edit the .jpg in your image editing software (it will look like an unrecognizable blob—just go with it) and then feed it back into the model for a reapplication of the texture by going to Tools>Import>Import Texture.
Once the model is perfected, you have the option of several export options. Did you know that Adobe Reader lets users move around a 3D model? It’s a fun and approachable option. The Wavefront obj file option allows you to to save without compression, though the file size is large.
 For this model:
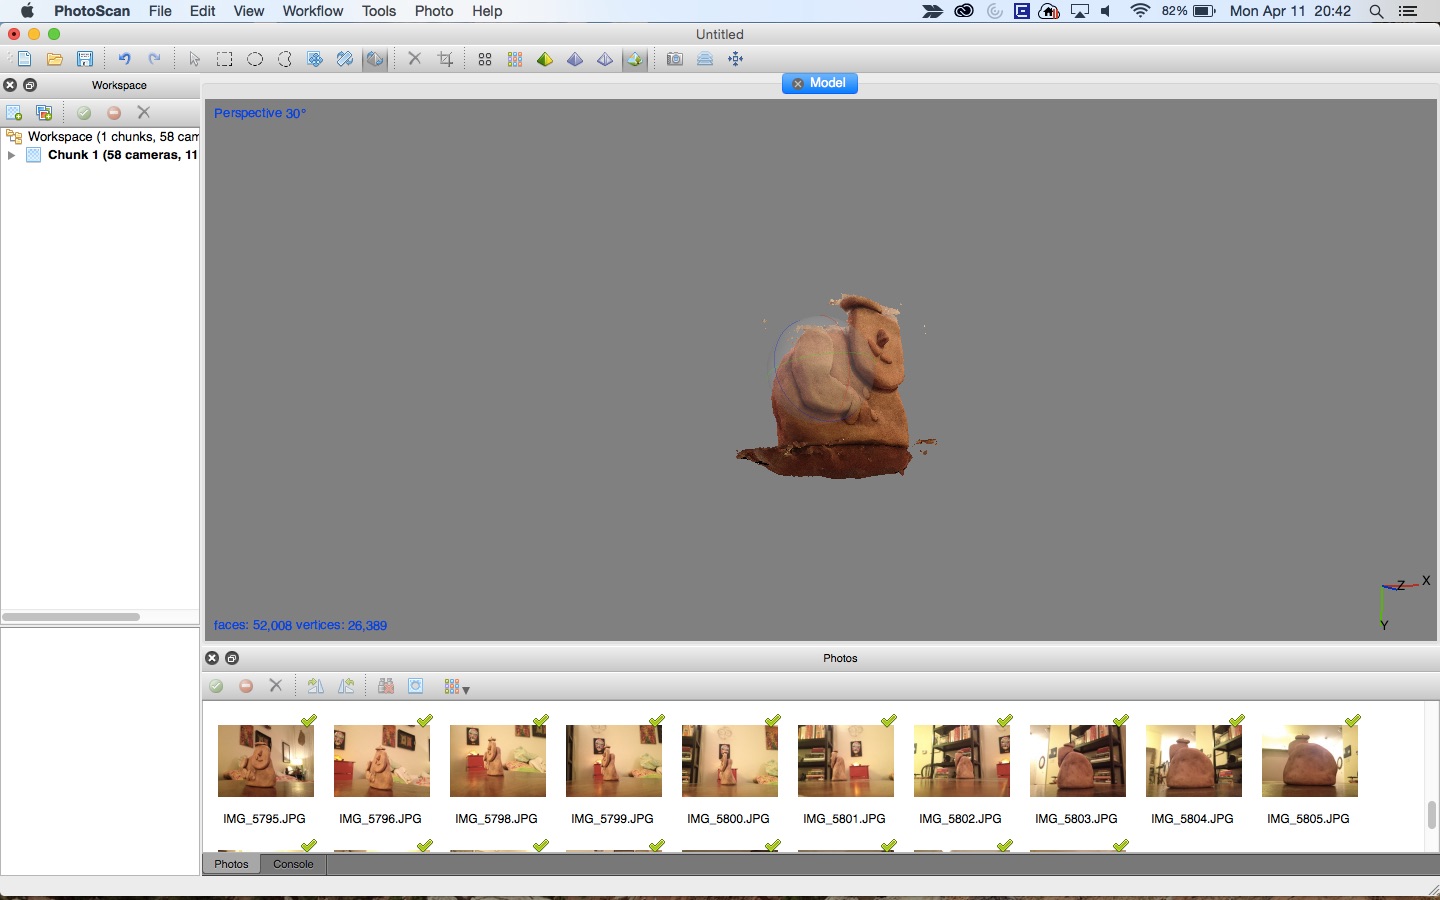
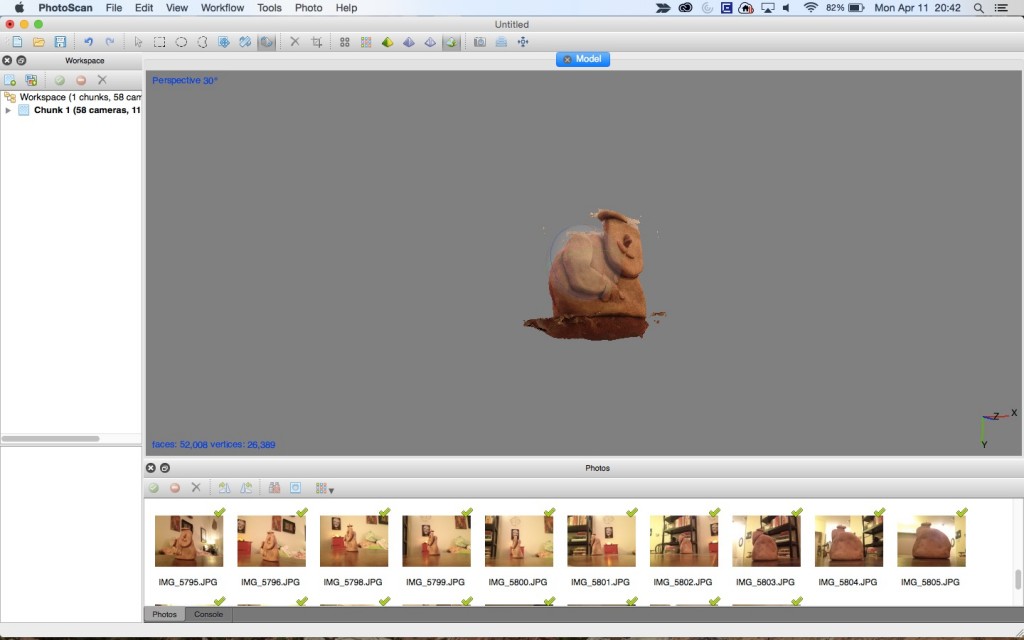
The photos that align properly show up with green check marks. I think part of the issue with this model is that I uploaded the photos slightly out of order, thus missing the full scan of the little Frenchman’s beret. That, the uneven lighting and the poorly contrasted background all contributed to the editing problems. If the model were better, it would be worth spending time with the magic wand or lasso tools to edit closer to the sculpture. For lighting, try to get neutral lighting that casts minimal shadows. Bright or harsh lighting not recommended. If you’re shooting outdoors, aim for cloudy days.
Sketchfab is a means of publicly sharing projects from 3D rendering programs. If you have paid for an Agisoft account, you can upload projects directly to Sketchfab. My account is super boring, since the free trial of PhotoScan won’t allow file export or saving. But RLA Archaeology has a fascinating and active account, so take a look there for a sampling of what Sketchfab has to offer as a public gallery of projects.
3D Printing
The process of creating the scan and watching such a textured image develop was gratifying—that scan being the one that we created in class with the brick, and not reproduced here. I’m certain that watching the model go through the 3D printing process would be equally fascinating. But the final product may be less satisfying. Most printers produce those heavily ringed models that require sanding before they look and feel more like a whole—rather than composite—object.
What’s really cool about 3D printing, though, you can use such an assortment of materials with which to print. For example, World’s Advanced Saving Project is building prototypes for affordable housing 3D printed from mud. Some artists are constructing ceramics from 3D models using clay (basically more refined mud). Still others are using metals for their work. The possibilities for art, architecture and material culture are overwhelming.
Hi Elizabeth,
This is a good analysis of the pros and cons of both Photoscan and 123D Catch. I’m very glad your pot turned out, even though it took so long! It’s also useful to know about the limitations in file export options for the free trial of Photoscan. I was able to upload my 123D Catch model to Sketchfab, and had intended to do the same with my Photoscan model, but it looks like that’s out of the question. One issue I did find with Sketchfab is that it’s a little difficult to manipulate the published model in Sketchfab (zoom in and move around, etc.). However, it does allow a relatively easy embed of a 3D model onto a website, which is pretty fantastic.